

Reflective topic concept maps are a way to graphically represent and organize information and ideas and how they relate to one another. The maps may be simple designs that concisely illustrate how your project's theme evolved through the research process and how the various encounters with information, sources, and people (e.g., library staff, peers, your professors) influenced your project. Or, they can be complex structures that delineate hierarchical or multiple developmental relationships.
Topic/concept maps are often used at the beginning of a research project to flesh out and brainstorm ideas and connections before delving into looking for sources.
For this award, we are asking for a reflective topic concept map. This can be created during or at the end of your research project to look back and reflect on the connections and relationships you made. Going through this creative process is a way to visually reflect on your research process and can compliment or inform your written reflective essay.
Winners will be asked to present this reflective topic concept map of their research at the Library Undergraduate Research Award ceremony.
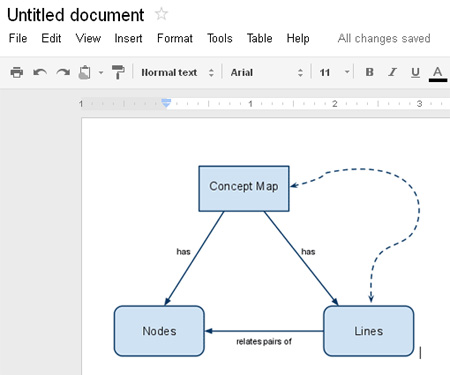
A sample Reflective Topic Concept Map:

Links to Concept Maps Examples
Need some help with Concept Mapping?: Contact a Subject Librarian or Schedule an Appointment
The first step is to login to your Google Docs account and Create a New document.
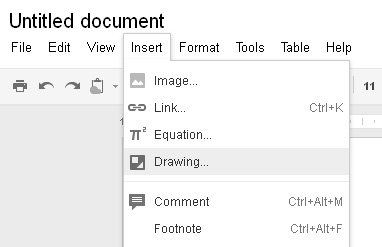
Once this document is opened, click on the Insert menu and select 'Drawing' to get started.

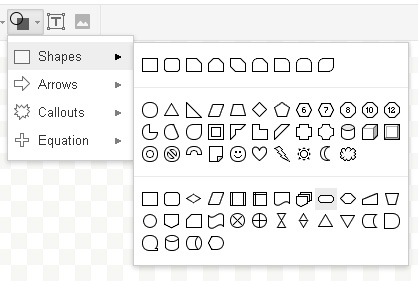
A new window will appear on top of your Google Document with menus for a variety of different tools that you can use to construct your diagram - including menus to create shapes, nodes, lines and arrows.


You can also add text to an already existing shape by double clicking on the shape and then typing in the resulting text box.
Once your diagram or concept map is complete, you can click the 'Save & Close' button in the upper right hand corner. This will embed your drawing within the Google document that you opened in the beginning. You can then add text around this drawing as if it were an image that you uploaded to the document.
You can click on the drawing to find the 'Edit' button and update your drawing at any time.

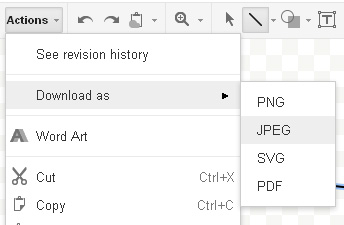
You may also want to add an image of your drawing to something else you are working on in another application, for instance, adding your diagram to a post (you will want to resize this image so that the entire thing fits nicely into your post - so read all the way through these directions!). In this case, before you 'Save & Close' select under the 'Actions' menu > 'Download as' > JPEG.

This option will allow you to save a .jpeg image of your drawing to your downloads folder on your computer.